


Step-by-Step Guide: How to Set Up Google Ads (Basic Concepts)
January 10, 2024


Fortune 500 companies are eliminating chief marketing officer roles as the position experiences a decline in influence within the C-suite
January 24, 2024Step-by-Step Guide: How to Set Up Facebook & Instagram Ads

In the age of digital marketing, Facebook and Instagram advertising has become an essential tool for promoting businesses, brands, or products. With their massive user bases, these platforms enable advertisers to precisely target their audience and maximize ad effectiveness. This guide aims to walk you through the process of setting up a Facebook/Instagram advertising account, allowing you to kickstart your advertising efforts on these prominent social media platforms.
Step 1: Log into Your Facebook Account
Firstly, ensure you have a valid Facebook account. If you don’t, register on the official Facebook website. Once logged in, use your username and password to access your account.
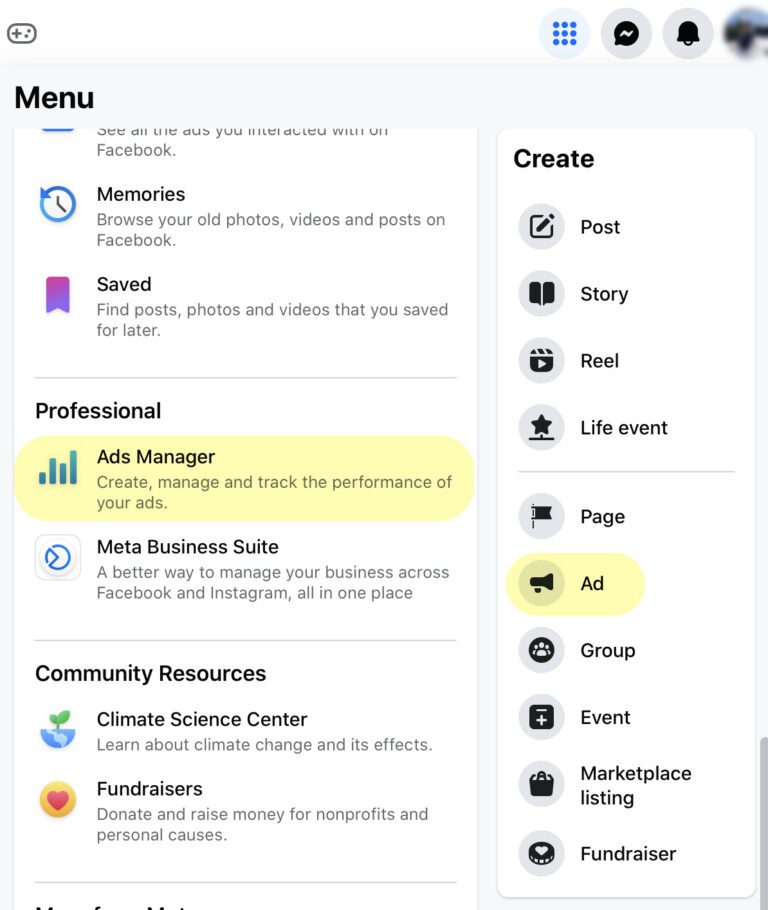
Navigate to your Facebook homepage, and in the top right corner, click on the dropdown menu. Select “Manage Ads.”

Step 2: Access Ads Manager
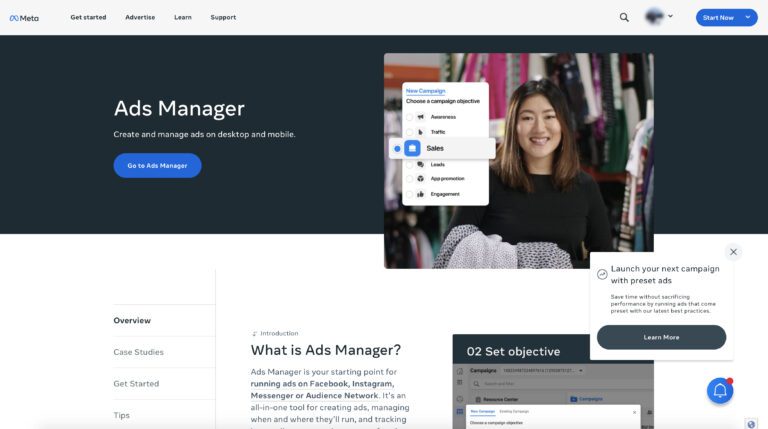
Once logged in, access Facebook Ads Manager. On the main page’s top right corner, click on the arrow, and select “Ads Manager.”
This takes you to the Ads Manager interface, where you can set up new ad accounts, manage existing ads, and configure various ad parameters.

Step 3: Create an Ad Account
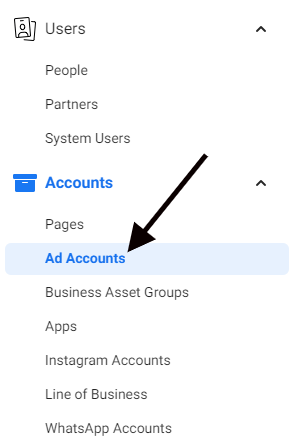
Now, let’s create your Facebook ad account. In Ads Manager, click on “Ad Accounts” in the left navigation bar and choose “Create Ad Account.”
Fill in basic information like your ad account name, time zone, and currency. Provide accurate details for better ad account management.
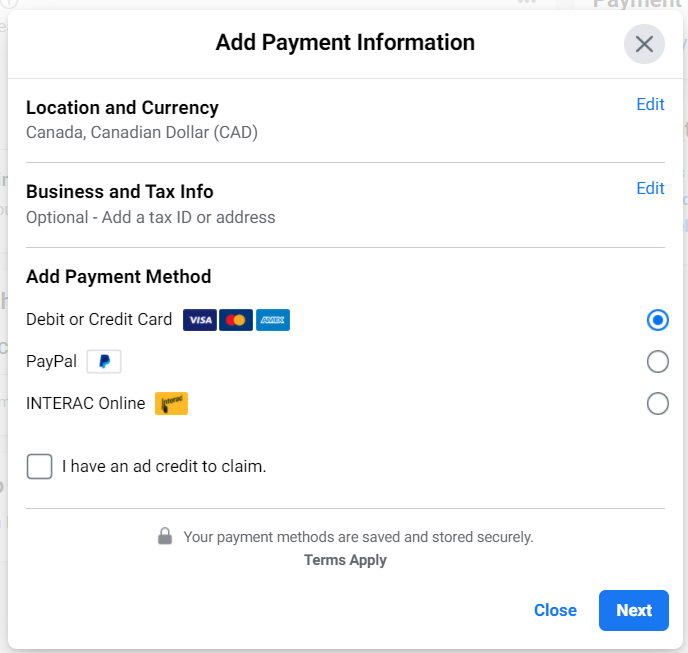
After clicking “Continue,” set up a payment method. Choose between credit card, PayPal, or other supported options. Fill in the necessary information to complete this step.
With this, you’ve successfully created a Facebook ad account, the first step in leveraging Facebook/Instagram advertising.

Step 4: Set Up Ad Account
After creating the ad account, set it up. In Ads Manager, select your ad account, and go to “Ad Account Settings.”
Configure essential options such as ad account budget, payment methods, and ad manager permissions. Review each option carefully.
- Budget Setting: Set the daily budget and schedule for your ad account in the “Budget & Schedule” option.
- Payment Method: Manage payment methods in the “Payment Method” option.
- Permission Management: Set permissions for ad managers if you collaborate within a team in the “Permissions” option.
After configuring, click “Confirm” or the respective button to save ad account settings.

Step 5: Create an Ad
With your ad account set up, create your first ad. In Ads Manager, select your ad account and click “Create Ad.”
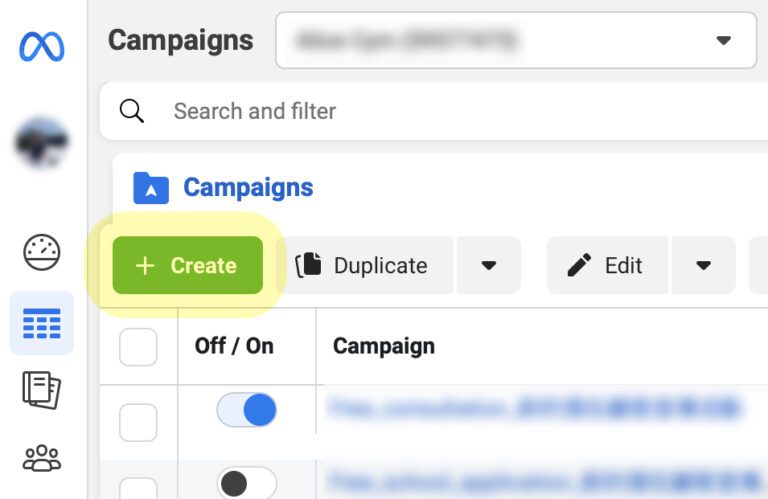

1. Choose Ad Objective: Select the objective that aligns with your business goals.
Traffic: | Objective: Increase the website’s visitation traffic. Application Strategy: Suitable for advertising campaigns aiming to enhance website click-through rates, visitor numbers, or guide users to specific webpages. |
Conversions: | Objective: Increase the conversion rate of specific goals (such as purchases, registrations, downloads). Application Strategy: Suitable for advertising campaigns aiming to convert potential customers into tangible actions, such as purchasing products, filling out forms, or registering as members. |
Brand Awareness: | Objective: Raise brand awareness, making more people familiar with your brand. Application Strategy: Suitable for new brand launches, brand reshaping, or businesses looking to expand their visibility. Typically emphasizes the visual appeal and emotional connection in advertising. |
Reach: | Objective: Display the advertisement to as many people as possible, expanding the advertisement’s impact. Application Strategy: Suitable for campaigns aiming to reach as many potential customers as possible, enhancing ad exposure, without emphasizing specific actions. |
Engagement: | Objective: Increase user interaction with the advertisement, including clicks, comments, shares, etc. Application Strategy: Suitable for campaigns wanting to build community engagement, promote user interaction, and expand brand influence. |
Video Views: | Objective: Increase the number of views for your video content. Application Strategy: Suitable for video-centric ads, such as brand stories, product showcases, aiming to have the audience watch and understand more content. |
App Installs: | Objective: Increase the number of installs for the application. Application Strategy: Suitable for businesses with applications, aiming to boost the number of app downloads through advertising. |
2. Define Target Audience: Define your target audience based on criteria like location, age, gender, and interests.
3. Set Budget and Schedule: Set the ad campaign budget and schedule.
4. Choose Ad Format and Placement: Choose ad format and specific placements, such as Facebook, Instagram, etc.
5. Edit Ad Content: Edit ad content, including title, text, images, or videos. Ensure it captures your audience’s interest.
Step 6: Review and Publish Ad
After creating, Facebook will review the ad to ensure policy compliance. Monitor the review status in Ads Manager.
- Understanding the review process: Reviews typically take some time, usually ranging from a few hours to a few days. During the review period, please be patient. Also, make sure that your ad complies with the advertising policies of Facebook/Instagram to reduce the review time.
- Publishing the ad after approval: Once your ad passes the review, you will be notified. At this point, you can return to the Ads Manager, select your ad account, and click on the created ad to start the advertising campaign.
- Monitoring ad performance: After successfully publishing the ad, closely monitoring its performance is crucial. You can use the data and analytics tools provided by the Ads Manager to track metrics such as click-through rates, conversion rates, and other important indicators.
- Optimizing the campaign: Based on the monitoring results, make necessary optimizations. This may include adjusting the target audience, modifying ad content, or tweaking the budget. Continuous optimization is key to ensuring the maximization of ad effectiveness.
Conclusion
Setting up and running a Facebook/Instagram advertising account is a powerful digital marketing strategy to expand your business. This guide provides a step-by-step process, from logging in to Ads Manager, creating an ad account, configuring options, creating ads, to monitoring and optimization.
Remember, Facebook/Instagram advertising is dynamic, so regularly check for updates and new features. Ongoing monitoring and adjustments ensure maximized ad effectiveness, achieving your business goals. We hope this guide serves as a practical tool, helping you create outstanding ad campaigns and drive your business forward.
BC² Media can help you enhance the efficiency of your online ad. Contact us today for more details and elevate your digital advertising strategy!



1 Comment
Hey very cool site!! Guy .. Beautiful .. Amazing .. I will bookmark your web site and take the feeds additionally?
I’m glad to search out a lot of helpful information right here within the put up, we’d like work out extra
techniques in this regard, thank you for sharing.